Espadrilles
- mademyownco
- Aug 20, 2017
- 3 min read
Updated: Jun 7, 2020
I’ve been looking for a workshop to learn how to make shoes, and I was super pleased to find that Leather Espadrilles workshop by Barang Shop.
The lesson was held in a Barang Shop’s little store / studio, and we each had our stations set up with tools and materials. The very supportive boyfriend joined me in the class, and he requested to use fabric instead of leather (this is both simpler and harder – I’ll explain later!).
We started the session picking out the material colours – me being the safe and conservative self picked a versatile nude shade. The boyfriend was more adventurous and picked some lovely contrasting colors for lining and elastic.

My nude coloured leather for upper and lining
The initial steps are quite similar to sewing / dressmaking – laying out a paper pattern on the material, and cutting the pieces into shape:


Two major differences are: 1) one cannot iron leather, so we use a hammer to flatten / pound it in shape; 2) leather is too thick to be sewn with non-industrial sewing machines, so we basically hand sew everything.
I attended a couple of leather workshops before (Long Leather Wallet, Small Leather Goods), so I had a bit of mental preparation for all the punching and sewing needed (every hole needs to be punched with a fork-like prong – by punching, I mean using a rubber mallet to hit the prong until a hole is made).
Phoebe was our instructor for the day, and was super helpful & clear in explaining the steps to us, and also very flexible in allowing us to customize our designs along the way.

After “hammering” the “hems” down on the leather pieces

Using a rubber mallet and prong to punch holes to sew

Sewing through the holes we manually punched

After spending quite some time punching, and sewing – the shoe starts to take shape!

(Overly-kiasu) pinning of the leather to the sole before starting on the final blanket-stitching to attach them together
After some time (and some pretty sore fingers) – they’re done!
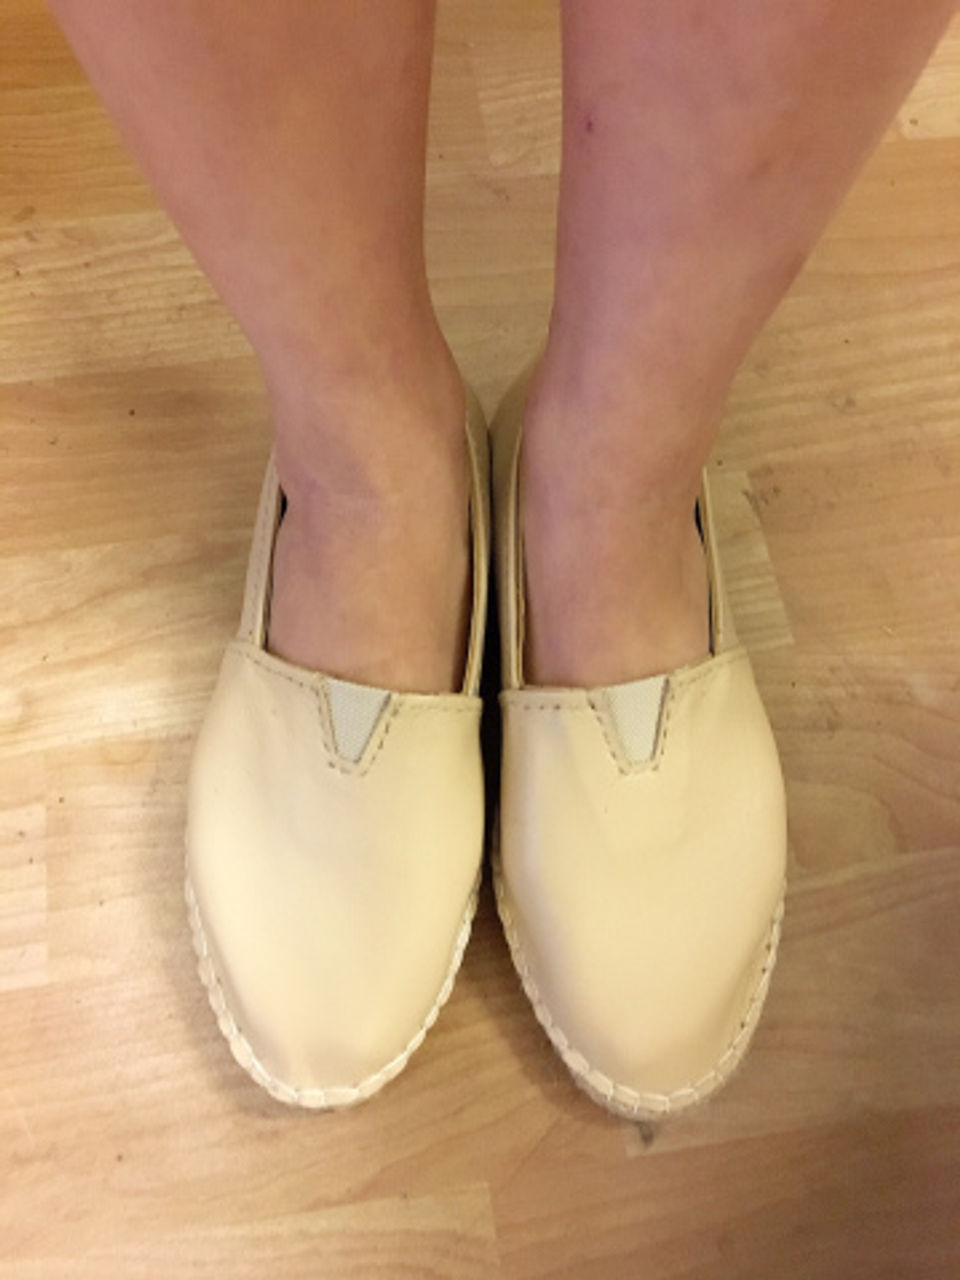
Very soft and comfortable to wear! I chose a softer leather for the front, because I have wider feet and am blister-prone

Blanket-stitch all around the shoes – pushing through the jute and leather can be a bit painful at the thicker / harder parts

The boyfriend’s canvas espadrilles! Love the funky contrast elastic piece

My first pair of hand-made shoes!

The boyfriend’s – with such a lovely fabric as a lining

🙂
Details of the workshop
Duration: ~8-9 hours, including a lunch break in between Price: SGD 220, includes all materials and your shoe pattern to take home (I booked on LessonsGoWhere and there was an NDP discount code). Barang Shop created a special price (SGD200) for my boyfriend as he wanted to use fabric instead of leather
Level of “fun”: 4/5
Building a pair of shoes from scratch was really enjoyable – Phoebe was very patient and flexible in helping us customize our shoe designs based on what types of shoes work best of us (there were 4 of us in the class, and all of us made something different!).
She also showed us the various tools and explained why some are used over others (water-based glue vs ‘Elephant Glue” why/when to use a rubber mallet vs a normal hammer), which helped us understand the steps of the process better.
For those who opt for the fabric espadrilles (instead of leather), you even get to use a sewing machine!
Level of difficulty: 4/5
This workshop was quite a challenging one – the biggest challenge probably being the patience one must have over the 8-9 hour session (the last time I did the leather wallet workshop of a similar duration, it was split over 2 days). Personally, the steps weren’t difficult for me (save for a few occasions when it was harder to push the needle through a couple of thicker / harder parts of the leather & jute sole).
My boyfriend did have a bit more of a harder time with his fabric pair – I mentioned it was both easier and harder and here’s why:
– Easier: no need to punch holes before sewing and sewing machine can be used (giving some time advantage for quite a number of parts) – Harder: can’t leave raw edges as they are (elastic bits), hence need to spend more time putting the elastic section in; PLUS if you’ve never used a sewing machine or are not familiar, the time advantage might be lost, as you may end up doing a fair bit of unpicking for errors in sewing
Nevertheless, Phoebe was a fantastic instructor, and was always on hand to make sure we are on the right track, and was always able to steer us back on course whenever we make mistakes.


Comments